Imagine a spread so rich, so fragrant, and so incredibly simple to make, it transforms an ordinary piece of toast into an indulgence. Enter homemade vanilla butter. Often, when we think of compound butter, our minds drift to savory blends of herbs and garlic. But prepare to have your palate surprised and delighted by a sweet counterpart that is just as versatile and even easier to whip up.
This article will guide you through the delightful process of how to make vanilla butter from scratch. While you can technically combine pre-made butter with vanilla in mere minutes for an instant treat, we'll dive deeper into the rewarding experience of transforming fresh cream into a golden, vanilla-speckled spread. This method, while taking slightly longer than using store-bought butter, is still incredibly quick and yields a product of unparalleled freshness and flavor. You'll be amazed that such a luxurious spread requires so few ingredients and so little effort!
Why Homemade Vanilla Butter is a Game-Changer
The allure of homemade vanilla butter goes far beyond its delicious taste. There are several compelling reasons to make this a staple in your kitchen:
- Unmatched Freshness: Crafting your own butter means you control the quality of the ingredients from start to finish. The difference in taste between fresh, homemade butter and its store-bought counterpart is remarkable, especially when infused with real vanilla.
- Pure Ingredients: No mysterious additives or preservatives here! Just wholesome cream and natural vanilla, giving you peace of mind about what you're spreading on your family's food.
- Economical: While high-quality butter can be pricey, making it from heavy cream can often be a more cost-effective way to enjoy a gourmet spread, especially if you catch cream on sale.
- Customizable: This recipe is a fantastic blank canvas. Once you master the basic vanilla butter recipe, you can endlessly experiment with other flavors and sweeteners to suit any dish or occasion.
- Impressive Factor: Serving homemade vanilla butter is a subtle yet impressive touch that elevates any meal, from a casual breakfast to a festive brunch.
The Core Recipe: Making Vanilla Butter from Scratch
Learning how to make vanilla butter from scratch might sound daunting, but it's surprisingly simple and quick. The entire process from cream to butter, including the vanilla infusion, can be done in under 10 minutes with the right equipment.
Gathering Your Essentials: The Core Ingredients
The beauty of this recipe lies in its simplicity. You truly only need two main ingredients for the base:
- High-Quality Cream: This is the star of the show. Opt for fresh heavy cream, whipping cream, or double cream with a high-fat content (ideally 35-40%). The higher the fat, the more butter you'll yield. Ensure your cream is cold when you start.
- Vanilla: For that signature speckled look and intense flavor, a fresh vanilla pod is your best friend. Split it lengthwise and scrape out the fragrant seeds. If you don't have a pod, good quality natural vanilla extract or vanilla paste can be used, though you might miss the visual appeal of the specks. For an extra punch, you could use both!
Optional Enhancements:
- A Pinch of Salt: A tiny bit of salt (a quarter teaspoon or less per cup of butter) can remarkably enhance the vanilla flavor and provide a wonderful depth, balancing the sweetness.
- Sweetener: If you desire a sweeter spread, powdered sugar is ideal for its fine texture, preventing grittiness. Start with about 1 tablespoon per cup of butter and adjust to your taste. You can also use other finely ground sugars like coconut sugar or cane sugar, or even sugar alternatives.
Equipment for Success
While patience and a sturdy whisk will get you there eventually (and give your arm a workout!), modern kitchen tools make this process a breeze:
- Stand Mixer: With a whisk attachment, this is the easiest and most hands-off method.
- Hand-Held Mixer: Great for smaller batches or if you don't have a stand mixer. Use a large, deep bowl to prevent splattering.
- Fine-Mesh Sieve or Cheesecloth: Essential for draining the buttermilk.
- Cold Water/Ice Bath: Crucial for washing the butter.
Whipping Up Wonder: Step-by-Step Instructions
- Prepare Your Vanilla: If using a vanilla pod, slice it lengthwise and scrape out the seeds with the back of a knife. Add these seeds (and the pod if you wish, for extra infusion) directly to your cream. If using extract, add it later with optional ingredients.
- Whip the Cream: Pour your cold heavy cream (and vanilla seeds/pod) into the bowl of your stand mixer (or a large bowl if using a hand-held mixer). Begin mixing on medium-high speed.
- The Transformation Stages:
- Initially, the cream will become frothy.
- It will then thicken into soft peaks, then stiff peaks, resembling whipped cream. Don't stop here!
- Continue mixing. The whipped cream will start to look grainy and slightly curdled. This is a good sign!
- Suddenly, the mixture will separate into distinct yellow solids (butterfat) and a milky liquid (buttermilk). The butter will clump together, and the buttermilk will slosh around. This is the magic moment!
- Separate the Butter from Buttermilk: Stop the mixer immediately once the separation is clear. Place a fine-mesh sieve or colander lined with cheesecloth over another bowl. Pour the butter and buttermilk into the sieve. Gently press the butter to squeeze out as much buttermilk as possible. Save the buttermilk – it's fantastic for baking or making pancakes!
- Wash the Butter: This is a crucial step for extending the shelf life and improving the flavor of your butter. Transfer the butter to a clean bowl filled with very cold water, ideally with some ice cubes. Knead and press the butter in the cold water with your hands or a spatula. The water will become cloudy as residual buttermilk is released. Drain the cloudy water and repeat the washing process 2-3 times with fresh cold water until the water runs clear. This ensures all milk solids are removed, which can cause butter to spoil faster and taste rancid.
- Flavor and Finish: Once washed, place the butter back into a clean bowl. Now is the time to thoroughly mix in any optional ingredients: a pinch of salt, powdered sugar, or additional vanilla extract. If you added a vanilla pod earlier, you can remove it now or leave it for continued infusion if desired.
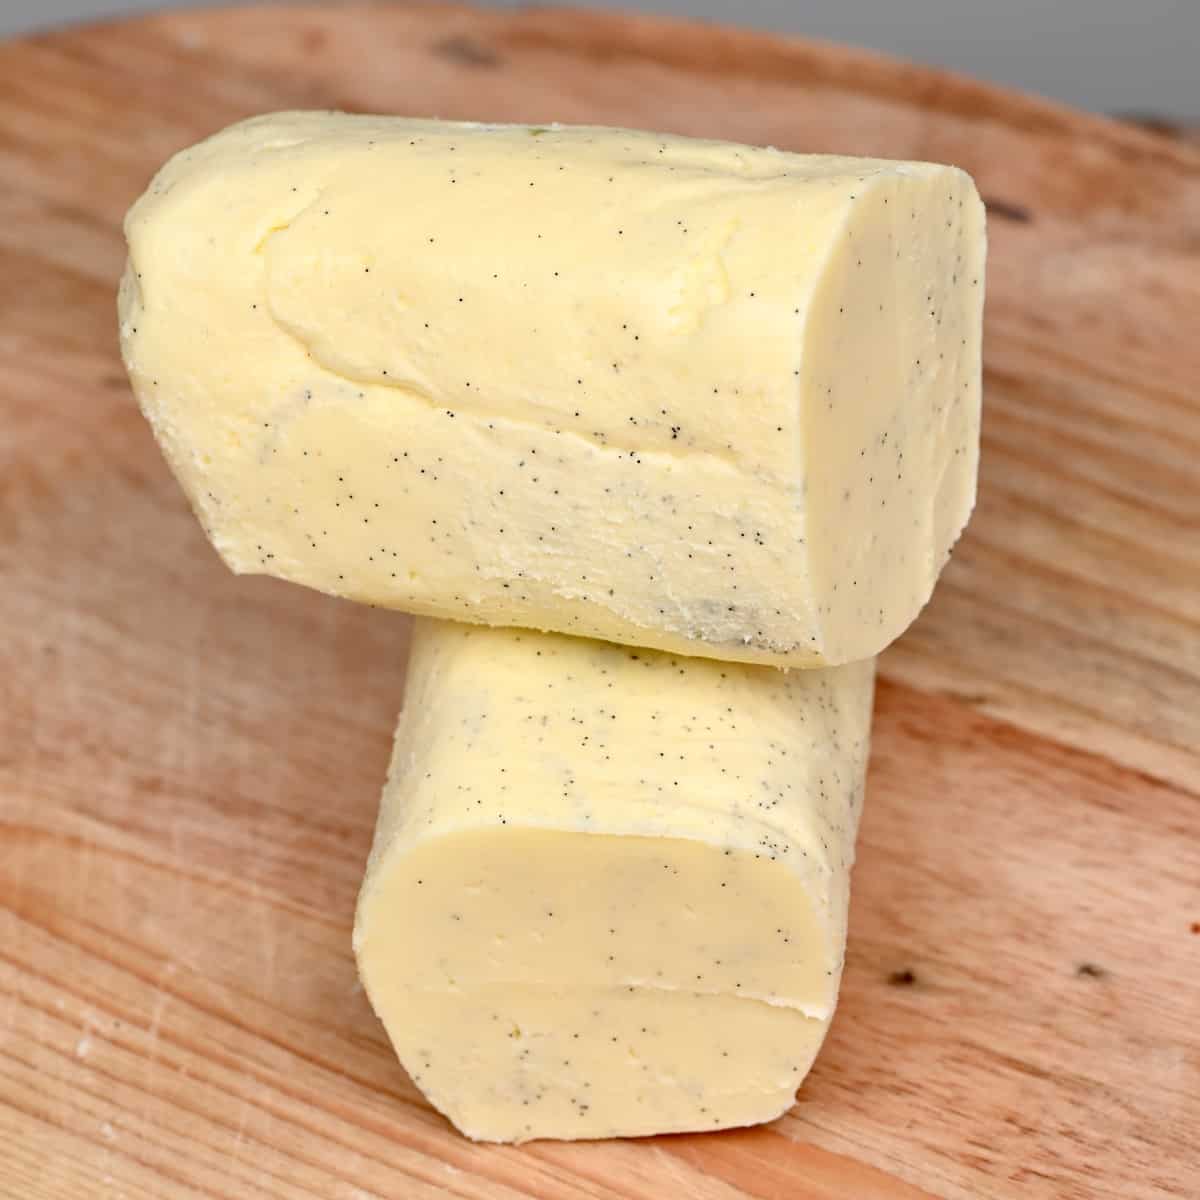
- Shape and Store: Press the vanilla butter into a block, roll it into a log using parchment paper, or pack it into a small jar.
Instant Gratification: The "2-Minute" Shortcut (Using Store-Bought Butter)
If time is truly of the essence, or you simply prefer not to make butter from scratch, you can still enjoy delicious vanilla butter with minimal effort. This method truly lives up to the "just 2 ingredients, ready in minutes" promise.
Simply take a stick of high-quality unsalted butter (at room temperature for easy mixing). Combine it with your vanilla (scraped seeds from a pod, vanilla extract, or vanilla paste) in a bowl. Use a fork, spatula, or hand mixer to thoroughly cream the ingredients together until well combined and fluffy. Add any optional sweeteners or salt at this stage. This quick hack gives you a delightful spread without the extra steps of making butter from cream.
Beyond Basic: Flavorful Twists for Your Vanilla Butter
Once you've mastered the art of how to make vanilla butter, you open up a world of culinary experimentation. Here are some fantastic ways to adapt your basic recipe:
Sweet Enhancements
- Vanilla Honey Butter: A classic for a reason! Add honey, 1 tablespoon at a time, to your vanilla butter until you reach your desired sweetness and consistency. It’s glorious on warm biscuits.
- Maple Vanilla Butter: Substitute honey with pure maple syrup for a rich, autumnal flavor. Perfect for pancakes and waffles.
- Brown Sugar Vanilla Butter: Cream in some finely packed light or dark brown sugar for a molasses-infused sweetness that pairs beautifully with baked goods.
Zesty & Spicy Adventures
- Citrus Vanilla Butter: Brighten your butter with the zest of lemon, orange, or lime. Around 1-2 teaspoons of zest for every cup of butter adds a vibrant, refreshing note.
- Cinnamon Vanilla Butter: A hint of ground cinnamon (1/2 to 1 teaspoon) creates a warm, comforting spice blend. It's excellent on baked apples or sweet potatoes.
- Vanilla Chai Butter: For an exotic twist, incorporate 1/2 to 3/4 teaspoon of a ground chai spice blend. This works wonderfully when combined with a touch of powdered sugar or honey.
- Nutmeg & Vanilla Butter: A pinch of freshly grated nutmeg can add a deep, warm aroma, especially lovely around the holidays.
Culinary Delights: Serving & Storing Your Homemade Vanilla Butter
Irresistible Serving Suggestions
The beauty of homemade vanilla butter is its incredible versatility. Here are just a few ideas to get you started:
- Breakfast & Brunch: Spread it generously on warm toast, pancakes, waffles, muffins, scones, or croissants.
- Baked Goods: Use it to elevate your sweet baking recipes, as a flavorful base for buttercream frosting, or as a rich topping for warm cookies straight from the oven.
- Desserts: A dollop on baked apples, sweet potato pie, or even a simple bowl of oatmeal transforms them into a gourmet experience.
- Unexpected Pairings: Try melting a spoonful over baked squash, roasted carrots, or even grilled peaches for a surprising sweet and savory contrast.
Storage Tips
Proper storage ensures your delicious creation stays fresh:
- Refrigeration: Store your homemade vanilla butter in an airtight container or tightly wrapped in parchment paper in the refrigerator for up to 1-2 weeks. The thorough washing step is key to this shelf life.
- Freezing: For longer storage, you can freeze vanilla butter for up to 3-4 months. Wrap it tightly in parchment paper, then in aluminum foil or a freezer-safe bag. Thaw in the refrigerator before use.
Conclusion
Learning how to make vanilla butter is more than just following a recipe; it's about unlocking a simple pleasure that elevates everyday meals and special occasions alike. Whether you opt for the quick, 2-ingredient shortcut or embark on the satisfying journey of making it from scratch, the result is a divinely fragrant, creamy spread that will quickly become a cherished staple. Experiment with flavors, savor its versatility, and enjoy the rich, pure taste of homemade goodness.
